How to Paint an Interior Door
Learn how to paint an interior door with a smooth, clean finish—no brush marks, no mess. These simple tips make all the difference.

Painting interior doors is one of the most affordable ways to bring character into your home (see this list for 9 other ideas!). I’ve been painting interior doors since I was old enough to hold a paintbrush (thanks, mom and dad)… And over recent years, I’ve designed several spaces with doors painted fun colors.


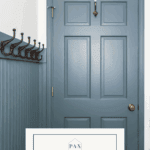
And most recently, I gave my sons’ bathroom a makeover. In the process, I painted the classic 6-panel door Benjamin Moore Boothbay Gray… and I’m in love!
But whether you are just refreshing classic white doors, bringing a touch of color, or color drenching completely, knowing how to paint interior doors the right way is key. And today, I’m excited to show you how. Read on to learn how to get a smooth finish, even on already-hung doors.
Painting Doors FAQs
I often save FAQs for the end. But since a lot of these common questions revolve around how you prep to paint the door, I thought we’d start with this today.
Should you paint the door in place or take it down?
When I am working with limited space, I always prefer to paint the door without removing it. I don’t like trying to realign doors on their hinges perfectly, and I like that I can paint both sides without waiting for one to dry.
To paint a door without removing it, be sure to protect the floor beneath. I like to use paper rather than a drop cloth in this case for better clearance. And I use painter’s tape to protect the hinges. Though painting the door frames around the hinges with a good brush is not very difficult, it can be easy to accidentally get paint on them when painting the front of the door or the door casing, so I prefer to tape them off.
Should you remove the hardware before painting doors?
As I said, I don’t remove hinges, but I do recommend removing the handles if you can. This will allow for a cleaner overall finish. Be careful to label and save all parts of the door hardware unless you are replacing it completely!

Do I need to prime my door before painting?
Yes! Even if your paint has primer included. Doors are notoriously easy to bang up, and its important for durability and adhesion to prime them. This will also solve any issues if you are switching from oil-based paint to latex.
What kind of paint should you use for interior doors?
Do I need a special trim paint? Many companies make trim, door, and cabinet paints. These are wonderful options for doors, especially in particularly high-traffic areas. However, any high-quality satin or semi-gloss paint will work, as well. I love Sherwin Williams Emerald interior paint and Benjamin Moore’s Ben line. Though neither are technically trim paints, I find the coverage and durability to be excellent.
Should I use oil based or latex paint? I prefer latex paints for easy clean up, but if extra durability is needed, you can use a hybrid paint like SW Emerald Urethane. Classic oil based paints are also wonderfully durable (but have a longer cure time).
What finish is best for interior doors? Sheen matters. I recommend satin or semigloss paint for interior doors, especially in rooms with moisture. Click here for more on paint sheens.
Can I use the same paint as my trim or walls? If you want to paint the doors and walls the same, then I recommend satin.
How to Paint Interior Doors
Now, finally, the tutorial. This is truly easy enough for a beginner DIYer!
Supplies You’ll Need
- Sanding block and/or 220 grit sandpaper
- Cleaning cloth and degreaser
- Screwdriver or drill
- Angled brush (my absolute favorite)
- Small foam roller and paint tray
- Painter’s tape
- Primer
- High-quality paint (for this tutorial, I used Benjamin Moore Ben in Boothbay Gray, satin)
1 – Prep the Door
Remove the door hardware. (Note: this was still a functioning bathroom for my boys… And since I was doing this makeover over the course of a week or so, I waited as long as I could to remove the door handle. Ha! It’s best to remove it now, but if you need to wait until later in the process, that’s ok, too.)
If you live in an older home, be sure to check for lead paint before you begin sanding! Otherwise, begin with a light sanding. You are not trying to remove the previous finish, just remove major imperfections in the old paint and rough up the door surface for better adhesion.


Next clean the door thoroughly, especially near the door handle since that is where the most dirt and oils are. You can use a tack cloth or damp rag to remove the sanding dust. But then I like to use a degreaser, like Simple Green, to make sure the door is really clean.
2 – Prep your Workspace
Now that the door is sanded and cleaned, bring in paper to protect your floors and painter’s tape to protect the hinges and trimwork that you don’t want painted. If you use a high-quality angled brush, you probably don’t need to tape off the walls. But if you are only painting one side of the door (like I was), you will want to tape off the line on the door frame. If you are NOT painting the edges of the door, then be sure to apply the tape firmly so you’ll have a clean line.
If you chose not to remove your door knobs, tape them off, too.
3 – Prime the Entire Door and Trim

Prime anything you are painting. To prime, I use a brush on any decorative paneling and trim. Paint in the direction of the wood grain (if there is any). For the flat portions of the door, I prefer to use the foam roller for primer. If you have a completely flat door, then I definitely recommend a roller rather than a brush. Apply a single light coat of primer with your small roller to avoid any paint drips.
Optional: At this point, if you have any cracks or damage to the door, you can fill with caulk or wood filler. Let that dry and sand any wood filler lightly before painting.
4 – Paint the Door
If you have a flat door (no texture), then use a foam roller for the flat surfaces, but for a wood-grain textured door, I prefer a brush. Apply a light coat of paint using your angled brush in this order and pattern:


- Start with recessed panels, painting with the grain of the wood
- Next start at the top of the door and paint one section at a time in the direction of the grain
*For a 6-panel door like this, it means horizontally in the center and vertically along the sides

Let the first coat dry and apply a second coat. While the second coat is still wet, carefully remove the painter’s tape. If you miss the window to remove the tape while the paint is still wet, you can lightly scour the edge with a utility knife before removing.

5 – Clean up and Install Hardware
Once the paint is completely dry, clean up the space and install your door handles. Be careful with the door for at least a week after painting to allow the paint to fully cure. Once cured, the finish should be smooth and durable.

Conclusion
In short, proper prep makes all the difference! If you are looking for more painting tips, be sure to check out these additional resources.
Do you have a door in need of a refresh? Let me know what color you’d try in the comments!

Great blog ! My doors are early 90s yellow orangey hollow core “ oak”. . The trim is the same color. Both have a shiny finish. Should I lightly sand or do I need to use a stripper? Thank you so much.
Apologies for the slow reply! Not sure why this comment was sent to spam… I would sand and prime for sure, but you shouldn’t have to strip the doors. If you are concerned about the primer adhering, you could try an oil-based primer like Kilz Original or a shellac-based primer like Zinsser Bin. Both should have better adhesion than a latex primer. Unfortunately, though, they are smellier and can’t be cleaned up with soap and water. So be forewarned. 🙂 Hope this helps!