Cloffice: How to Turn a Closet into an Office

In our most recent move, we gave up a bedroom… the one that doubled as my office and a guest bedroom. I did not, however, give up my job, obviously. And for a self-employed, work-from-home woman, home offices are kind of important.

So I began searching for an alternative. Enter a little closet with bi-fold doors in our primary bedroom.

While a closet office isn’t necessarily my ultimate ideal, here are the advantages it had:
- a structural spot to put my office desk
- a space for storage around my workspace
- separation from the noise of the main living spaces (since it is within a bedroom)
Before we continue, though, let’s back up a bit…
What is a cloffice?
When I first began this project, I actually was unaware of the term. But I love made-up words, so I grabbed onto it when my friend used it. Essentially a cloffice is just a closet that has been converted into an office. Check out my cloffice ideas on Pinterest for more inspiration.
You can convert just about any closet with the right plans. You don’t have to have a walk-in closet, reach-in closets can still create a perfect little nook. Creating a cloffice usually involves some sort of real adaptation of the space – e.g. adding shelving, a built-in desk, new lighting, etc. But however simple or dramatic the transformation, the end result is a functional home office space.
The Before: My Bi-fold Closet
Our new home has significantly more public space than our last house, which is wonderful for entertaining and gathering, but losing my entire room office from our last home posed a challenge. However, the primary suite has a large closet in the bathroom as well as this bifold closet in the bedroom.

So I decided I would make the most of it.
How to turn a closet into an office nook:
Step 1: Remove or Replace Doors (optional)

I gathered closet door ideas for some time before beginning this project… But eventually I decided that I liked the idea of the desk nook as a visible balance to our fireplace bookcases. So in my case, I removed the bifold doors and all their hardware. Then I patched, filled, primed, and painted the casing so that I was left with a simple cased opening.
Step 2: Remove Closet Rods and Supports

I was fortunate to be able to maintain a few elements in my closet, such as the main support for the hanging bar and a sort-of floating shelf above it. However, the brackets and clothes bar had to go. I used a small piece from the lower bar supports to patch the upper bar support where the bar had been, giving it a continuous final look.
Step 3: Add Outlets and Lighting
An electrical outlet is essential for a workstation! So I had an electrician run a simple outlet inside the closet at the shelf level so that it would be easy to reach. Be careful not to hide an outlet where it would be difficult to access in a small space like this! With the outlet on the front wall of the closet, I can hide the cords for my laptop and monitor from sight.

Speaking of essentials, good lighting is so important for a desk area, as well. Forutnately for me, the placement of the light in the closet was good for lighting my desktop, so I simply replaced the single bulb that was there with this led flush mount light fixture. You can only really see it when sitting at the desk, but I think it is both stylish and functional, providing plenty of light for my work.
Step 4: Install Wall Treatment
This is optional, but I love the look of added tile, trimwork, wallpaper, or paneling in a nook like this. I decided to keep it simple by adding beadboard to the closet walls for a little texture. I have a full tutorial here on how to install beadboard if you’re interested.
Tip: mark your studs with painters tape before installing the beadboard so you can attach it


In this case, I use a special little trick so I didn’t have to remove the new baseboards we had installed when we put in new wood floors. Basically, I used this base cap molding upside down to provide a platform for the beadboard. Plus it added a little extra interest.


I also used a petite stepped trim to finish off the top edge of the bead board. In short, pretty trim all around makes for an elegant little desk nook!
Step 5: Build In Shelving
Let me be clear, this is not a large closet. It’s just shy of 24 inches deep and just over 6 feet wide. So I was determined to make the most of the limited square footage. On one side, I intentionally left it open so that I could store my tripods and lighting equipment that is too tall for any shelf.
On the other side, an air return makes a perfect ledge for shelving.

I created simple fixed diy open shelving from plywood and 1x2s. They’re not really floating shelves, but by using a 1×1 cleat that is covered by the 1×2 edging on the front of the shelf, it gives the appearance.


Step 6: Paint
Of course, once all the construction is done, caulk, fill, prime (if needed), and paint the space! I used SW Eventide, a beautiful green blue gray (one of my favorite colors) to give a pop of color in the room.

Step 7: Add Desk
I used this beautiful antique mirrored vanity with drawers that is a family heirloom. I have recently been dreaming up the option of a motorized standing desk, though, so that I can use my new walking pad. I have marble desk top ideas and some creative plans in the works… The DIY cloffice project is a gift that keeps on giving!
Step 8: Style
The most fun part of any project is putting your personal style on it. I used my magic trick to turn an art print into a painting and hung these gorgeous flowers in a vintage frame.

I added baskets, file holders, fabric boxes, and an antique box to store my interior design samples, photography equipment, and more. The upper shelf, especially gives me plenty of space to organize a significant amount of resources.

The After: Finished Cloffice Reveal
I just love how it came together. Would I prefer a separate room as an office? Yes, but I believe in making the most of what you have and being grateful for it. And I am! I love this little space.

Sources and Product Links
- Paint color: Sherwin Williams Eventide
- Bead board: get a tutorial here
- Base cap molding: to install beadboard without replacing baseboards
- Desk: antique
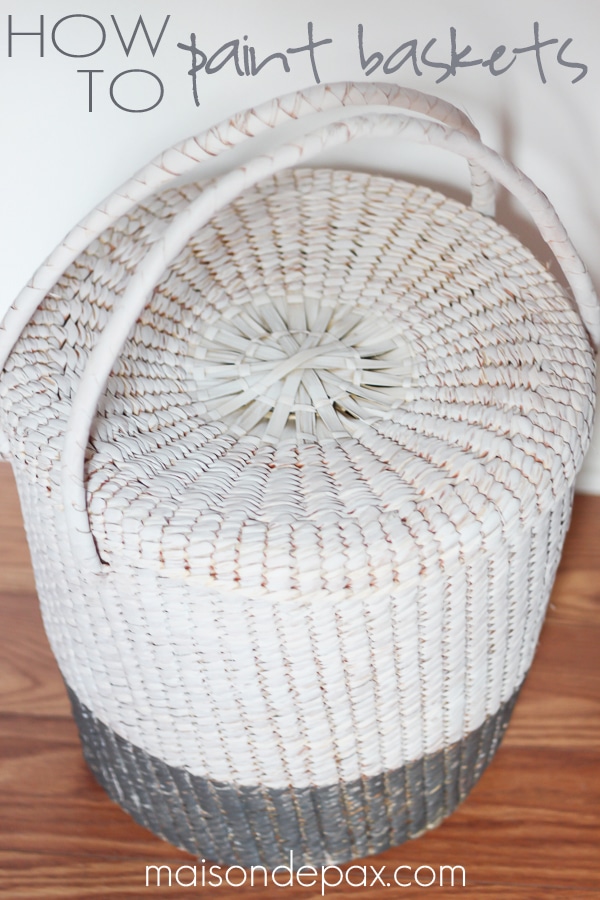
- Storage: basket (similar), acrylic magazine holder, fabric boxes
- Artwork: vintage frame, printed artwork with painting trick
Whether you work from home, as I do, or simply want an organized option for periodic remote work, I hope that this closet converted to a desk nook inspires you!