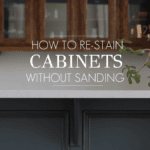
Re- Staining Wood Cabinets
Step by step tutorial for re-staining wood cabinets: How to turn outdated orange oak cabinets a beautiful classic brown without any sanding or stripping required!

While I may love Flashdance, jellies, and Trapper Keepers… As far as I’m concerned, the 1980’s can keep its big hair, neon colors, and orange oak cabinets. But unfortunately, the decade didn’t get the memo and left quite a few of those last ones in our new house.


This was the bar area when we bought the house. We replaced the floors before we moved in, then I started on the bar by replacing the countertops and painting the base cabinets this beautiful blue. Catch up on the bar projects here. And this is how it looks now.

Dark Brown Stained Oak Cabinets
Stained kitchen cabinets can be so beautiful, and natural grain wood is a wonderful way to incorporate texture into any space. Plus, stained cabinets tend to be more forgiving (hiding dirt and wear better) than painted surfaces.
We installed these beautiful new floors when we bought the home, and I knew I wanted to echo that color with upper stained cabinets in the bar. The floors are white oak with a medium brown walnut color, while the cabinets are red oak…

What’s the difference between white oak and red oak? They are related but have a few differences which were relevant to my project.
- Grain patterns: Red oak tends to have slightly more pronounced grain patterns, but they can have similar shapes and swirls to white oak, which worked in my favor.
- Color: Red oak tends to lean pink, while white oak has more brown and yellow undertones.
So my goal was to match the orange (red oak) cabinets to the brown (white oak) floors. To give you a better idea of the task at hand, here is a side by side of the orange cabinets against our new floors.

Re-Staining Oak Cabinets
Wood cabinets can theoretically be stripped and restained. But that is a lot of work! My goal was to find a way to make these cabinets look like them matched the floors without having to use stripper or to sand off the existing finish.
Gel stains are a great way to do that. Normal wood stains soak into the wood, leaving the wood grain showing through but altering the color. Gel stains, however, sit on top of the old finish and create a transparent (or partially transparent) finish that still allows you to see the wood grain showing through.
However, this project was not quite as simple as applying a gel stain color I liked. I wanted the finished product to look like our floors… so I had to create a custom look.
Today I want to walk you through how you can restain outdated cabinets without stripping or sanding AND show you exactly how I got the color I was hoping for.

How to (Re) Stain Wood Cabinets
Supplies You’ll Need
Before beginning, gather all the necessary supplies:
- Screwdriver or drill (for removing cabinet doors and hardware)
- Drop cloths or plastic sheeting, gloves
- Painter’s tape
- Cleaning solution (like fusion’s tsp alternative or a mild degreaser)
- Tack cloth or microfiber cloth
- Fusion Mineral Paint in Coal Black
- Fusion Gel Stain and Topcoat in Double Espresso (or colour of your choice)
- 2” angled paintbrush
- 4 or 6″ foam roller
Step 1 – Prep the Cabinets
Start by removing the cabinet doors, drawers, and all hardware, including hinges and knobs. Use a screwdriver to carefully detach each piece, and keep all screws and hardware in a labeled container to avoid losing any parts.
Tip: Number the doors and their corresponding frames with a piece of painter’s tape to ensure you can reassemble everything correctly.
Cleaning is a crucial step to ensure the paint adheres properly. Use a strong cleaning solution like TSP or a mild degreaser to remove all dirt, dust, grease, and grime from the cabinet surfaces. This prep step might seem tedious, but it’s essential for achieving a smooth, long-lasting finish. Wipe with a clean rag.
Step 2 – Paint Wash the Grain
This step is optional, but I love the effect it produced. Can you see how our wood floors have a darker stain in the wood grain?

I tested the new stain alone, and it didn’t give enough depth to the grain… So I used a little watered down Coal Black paint to achieve that effect.
First, add some water to your paint. I did approximately a 1:1 paint:water ratio. Then stir well. Paint the wash mixture lightly and wipe off immediately with a paper towel or other clean cloth. Work in sections.


Tip: This is a messy process, so I definitely recommend using gloves.
See the before and after for the subtle (but important!) difference.


Wait at least an hour for the paint wash to dry before proceeding.
Step 3 – Apply the Gel Stain
It is normally important to paint gel stain on very smoothly because it sits on top of the previous finish. However, the color was too dark and opaque for my liking, so I came up with an alternative to get a lighter coat. Complete this step in a well-ventilated area.
Apply the gel stain lightly over a small section of the wood; your brush strokes can be random. Then immediately use a clean, dry foam trim roller to spread the stain across the area and soak up any excess stain.


Be sure to apply all these same steps to the cabinet frames.

Tip: Follow the drying times per the manufacturer’s instructions.
Step 4 – Reassemble the Cabinets
When everything is dry, replace the removed cabinet doors, drawer fronts, and handles. Be gentle with your new finish for a couple of weeks. After that, your newly stained cabinets should be durable as ever.

Extra Tips And Tricks
If you are working to match another color, I always recommend experimenting! I tried a few different options on the back of a door before I landed on the plan I followed.

Be extra careful not to apply it too thick. If you choose not to sponge off the excess with a roller like I did, you’ll want to make sure all your brush strokes go in the direction of the wood grain. And still apply light, even coats or you will get drips and runs.
Remember that you can add a second coat or even a third to get a darker look, but each layer is a little more opaque. So the more layers, the less wood grain will show through.
Remember, no sealer is needed with this Gel Stain + Topcoat! No stripping, no sealer… very DIY friendly! With that, I hope you feel empowered to try it.