How to Paint Cabinets with Fusion Mineral Paint
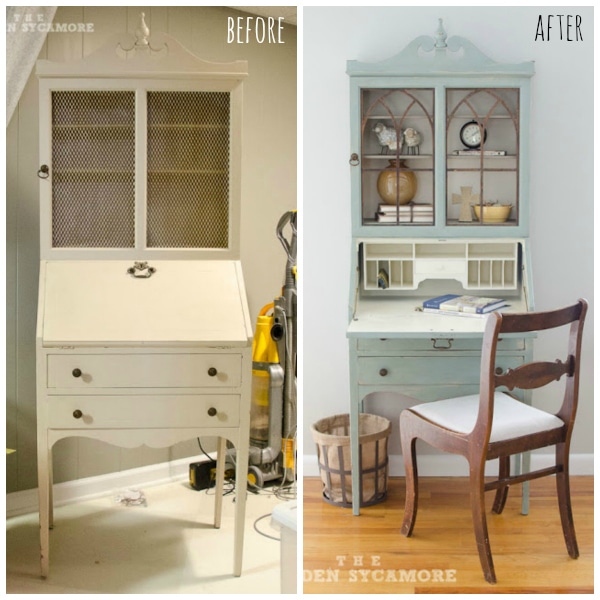
Updating outdated cabinets is a fantastic way to breathe new life into your home without breaking the bank. One of the most effective methods for transforming old cabinets is paint. Learn how to paint cabinets with Fusion Mineral Paint for a beautiful DIY transformation!

When we bought our 1980’s home, the bar off the sunken living room was equally one of the greatest eye sores and one of my favorite “character” elements. This is only a start to the plans for this space, but you can see all the projects in the bar makeover here.


In this post, I’ll show you how we updated our cabinets from an outdated orange oak to a beautiful blue-gray shade called Cambridge. This project is a perfect weekend DIY endeavor that can dramatically change the look of your space.

Why Choose Fusion Mineral Paint?
Fusion Mineral Paint is a high-quality, durable acrylic paint that is easy to work with, making it ideal for beginners and experienced DIYers alike. It offers excellent coverage, a beautiful finish, and doesn’t require a primer or a topcoat. It works on all types of wood or laminate.
I’ve used Fusion Mineral Paint for years. This post is not sponsored, but they did provide the paint when I asked. Here are a few more of my Fusion Mineral Paint projects.
I want to add that this is my first time painting cabinets with Fusion. I’ve painted lots of furniture, including very high-traffic furniture, with great success. So I feel confident that the bar will stay looking beautiful for a long time. However, if you are painting kitchen cabinets or bathroom cabinets that get loads of daily use, I have also had good success with this method for a really durable finish, but it is definitely a slower and more involved process than this project.
How to Paint Cabinets with Fusion Mineral Paint: A Step by Step Guide
Supplies You’ll Need
Before diving into the project, gather all the necessary supplies:
- Screwdriver or drill (for removing cabinet doors and hardware)
- Drop cloths or plastic sheeting
- Painter’s tape
- Cleaning solution (like fusion’s tsp alternative or a mild degreaser)
- 220 grit sandpaper
- Liquid sandpaper (deglosser)
- Tack cloth or microfiber cloth
- Fusion Mineral Paint in Cambridge (or colour of your choice)
- 2” angled brush
- Optional: Fusion Stain and Finishing Oil
Step 1: Remove Cabinet Doors and Hardware
Start by removing the cabinet doors and all hardware, including hinges and knobs. Use a screwdriver to carefully detach each piece, and keep all screws and hardware in a labeled container to avoid losing any parts.
Tip: Number the doors and their corresponding frames with a piece of painter’s tape to ensure you can reassemble everything correctly.
Step 2: Clean the Cabinets
Cleaning is a crucial step to ensure the paint adheres properly. Use a strong cleaning solution like TSP or a mild degreaser to remove all dirt, grease, and grime from the cabinet surfaces. This prep step might seem tedious, but it’s essential for achieving a smooth, long-lasting finish.
Step 3: Sand the Cabinets
Once the cabinets are clean and dry, give them a light sanding with 220 grit sandpaper. You could use a palm sander, but I prefer to do this by hand. This step helps to smooth out the surface and create a slight texture for the paint to grip. You are NOT trying to remove the old finish, so don’t work too hard. In fact, my sweet daughters did most of the work on this.

Focus on any areas that might have imperfections or a glossy finish. After sanding, wipe with a damp rag to remove all sanding dust.
Tip: Sanding can create a lot of dust, so be sure to protect your work area with drop cloths or plastic sheeting and wear a dust mask if you are sensitive.
Step 4: Wipe Down with Liquid Sandpaper
After sanding, wipe down the cabinets with liquid sandpaper (also known as a deglosser). This product helps to further prepare the surface for painting by removing any remaining residue and slightly etching the surface. Follow the manufacturer’s instructions for application and drying times.

Step 5: Set Up Your Painting Area
Set up a well-ventilated workspace for painting. Lay out drop cloths or plastic sheeting to protect your floors and countertops. Use painter’s tape to mask off any areas you don’t want to paint, such as the walls or backsplashes. I opted to paint the cabinet doors and drawers in the garage.
At this point, I also added some extra decorative trim to our bar. Get more details on adding trim like this in this post.

Step 6: Paint the Cabinets
Now comes the fun part – painting! Using a 2” angled brush, apply the first coat of Fusion Mineral Paint in Cambridge. Start with the edges and detailed areas before moving to the larger, flat surfaces. The angled brush helps to get into corners and create a smooth finish. You can also use a high-quality trim roller for the flat portions if you want, but I was painting oak and wanted the paint to seep into the grain, so I used a brush for the entire project.

Tip: Don’t overload your brush with too much paint. Instead, apply thin, even coats to avoid drips and brush strokes and achieve a more professional-looking finish.
Whether or not you paint the inside of the cabinets is up to you. I opted to paint just the front edges of the shelves and then install peel-and-stick wallpaper as shelf liner.


Step 7: Let It Dry and Apply a Second Coat
After applying the first layer, allow it to dry completely. Fusion Mineral Paint typically dries quickly, but it’s best to wait at least 2-4 hours between thin coats. Once the first coat is dry, lightly sand any rough spots or drips with 220 grit sandpaper, then wipe down with a tack cloth to remove dust.
Apply the second coat of paint, following the same method as the first. The second coat should provide complete coverage and a rich, even color. I found that this dark color still needed a few touch ups after coat 2, but not a full third coat.
Tip: After the second coat is dry, use a flashlight to go over the cabinet frames and doors and look for any spots that need a little touch up. Be sure to still use light, even strokes when touching up small spots. The paint should level out nicely.
Step 8 (Optional): Apply a Top Coat
Fusion paint has a built-in top coat, but you can add an additional top coat for greater durability. Fusion paint will work with a variety of top coats: wax, polyurethane, fusion’s tough coat, etc. Remember that top coats can change the sheen or gloss of the paint. Since our bar cabinets don’t get a ton of abuse, I opted not to add one. But for a kitchen or bath, I would recommend using the Stain and Finishing Oil. See this post for step-by-step instructions.
Step 9: Reassemble Your Cabinets
Once the second coat is fully dry, carefully reattach the cabinet doors and hardware. If you’ve kept everything organized and labeled, this step should be straightforward. Take your time to ensure all screws are securely tightened and the doors are properly aligned.

Step 10: Enjoy Your Updated Cabinets
Step back and admire your handiwork!

Additional Tips for Success
- Test the Color: If you’re unsure about the color, test it on a small, inconspicuous area first to see how it looks in your space.
- Work in a Well-Ventilated Area: Ensure you have good ventilation while painting to avoid inhaling fumes and to help the paint dry faster.
- Use Quality Brushes: Investing in a high-quality brush will provide better coverage and make a significant difference in the smoothness of your finish.
- Be Patient: Allow ample drying time between coats and before reassembling to ensure the paint has fully cured.
- Consider a Top Coat: While Fusion does not require a top coat, you can add one for additional durability. See step 8 above for more details.
Conclusion
Painting your cabinets with Fusion Mineral Paint is an excellent way to update outdated cabinetry without the expense of a full renovation. The color Cambridge is a stunning, complex blue-gray with some underlying hints of green that adds a classic and sophisticated touch to any room.

If you’re looking for a weekend project that offers high impact with relatively low effort, give painting your cabinets a try. As always, I love DIY projects because they not only save money, but give you the satisfaction of transforming your space with your own hands.
Happy painting!