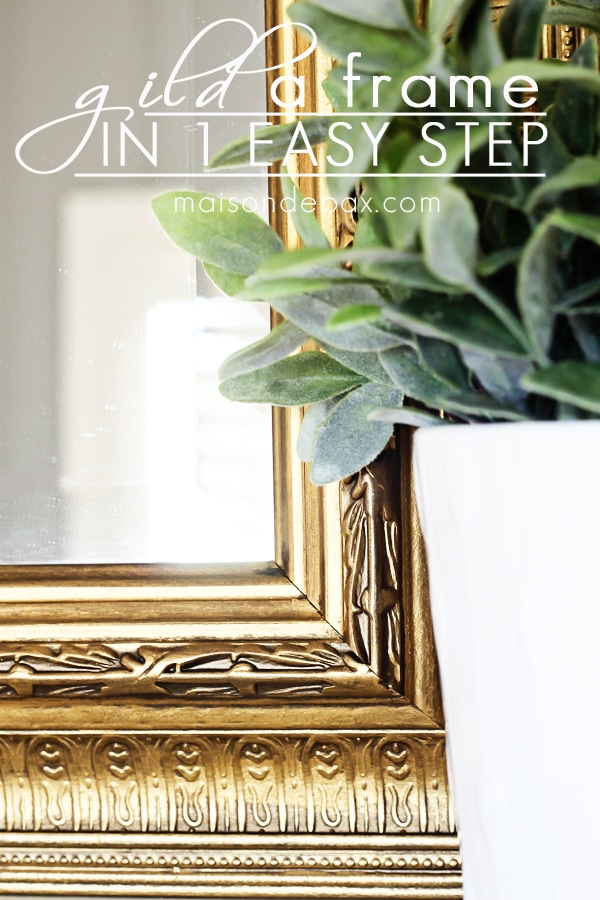
How to Gild a Mirror Frame for the Perfect Gold Finish
Learn how to gild a mirror frame for a timeless, high-end look. Easy DIY steps for a perfect gold finish on any frame.

Why Gilding a Mirror Frame is the Perfect DIY
Imagine huge, floor-to-ceiling windows with chunky, ornate hardware that has that perfect patina of age. They open onto a petite balcony, complete with an exquisite wrought iron railing. Beyond the railing lies the warm grayish stone. The red tile roofs. The little chimneys. The tree-lined boulevards. The little sidewalk cafes.
Paris.
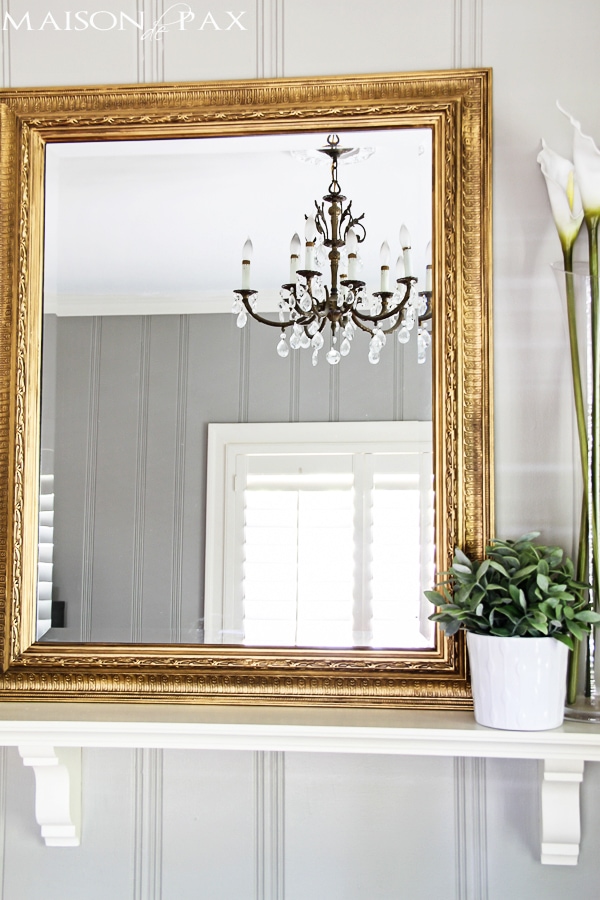
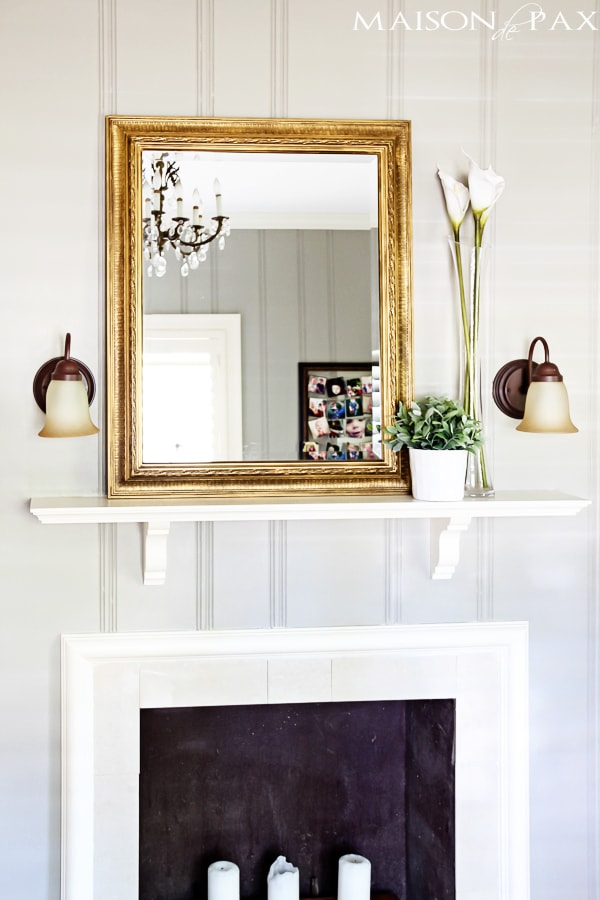
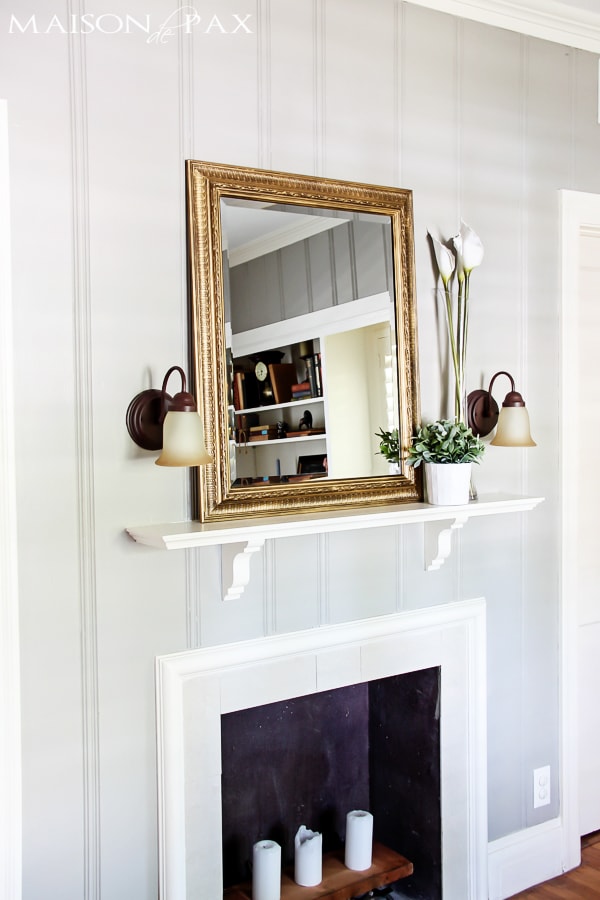
If you turn around, you see the perfectly aged, ornately carved, gold leaf antique frame. It sits atop the lovely fireplace…
Mirrors like that: the perfect, hand carved gorgeous specimens you find sitting atop the delicate mantels in Parisian apartments will cost you hundreds or even thousands of dollars. Trust me, I drooled over them while we lived there.
But this little mirror frame (which I bought at Marshalls at least 5 years ago for ~$40) now has that quality for me. That timeless appeal. That refined glamour. That essence.
How to Gild a Mirror Frame
Supplies Needed for Gilding a Mirror Frame
- ornate mirror frame
- drop cloth and/or paper towels
- (optional) gloves
- (optional) black spray paint
- Rub ‘n Buff in Gold Leaf (although they make other beautiful metallic finishes, including a silver leaf copper leaf type option)
- lint-free rag or small paint brush
- (optional) painter’s tape
- (optional) antique wax
Step-by-Step: How to Gild a Mirror Frame with Gold Leaf Rub ‘n Buff
Once you’ve gathered your supplies for your gilding project, here are your instructions:
1. (Optional) If you tend to be a messy artist, tape off the mirror with painter’s tape and protect your space with a drop cloth. You could wear gloves, too, if you want.
2. (Optional) If your frame is not black or bronze or darker color to start, I recommend spray painting the frame black first like I did with these frames.
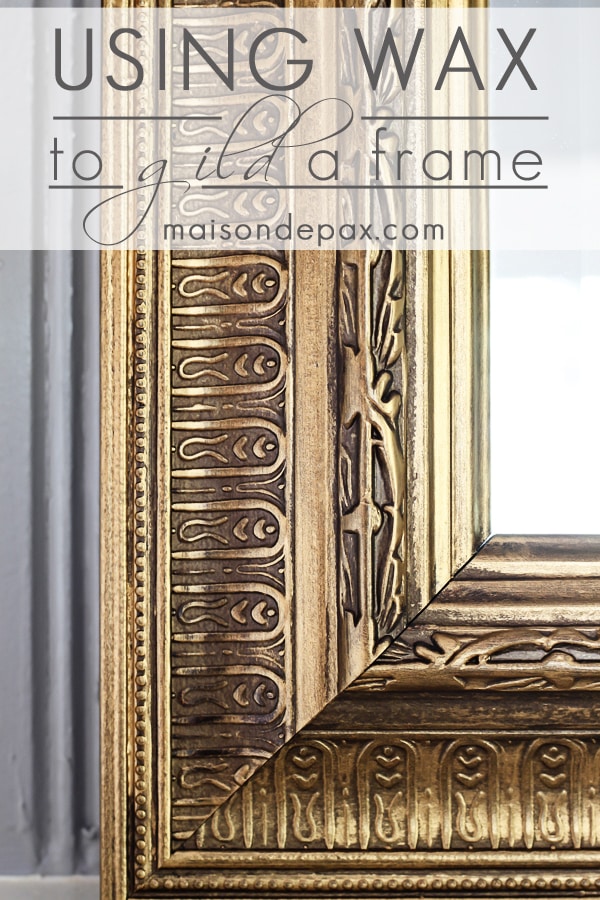
3. Lightly paint or rub on small amounts of the gold wax. You can use a soft cloth or a small paintbrush or even your fingertip, but do NOT fill in every crevice. You can see as I began my gilding process on the lower right hand side. The difference was subtle at first.
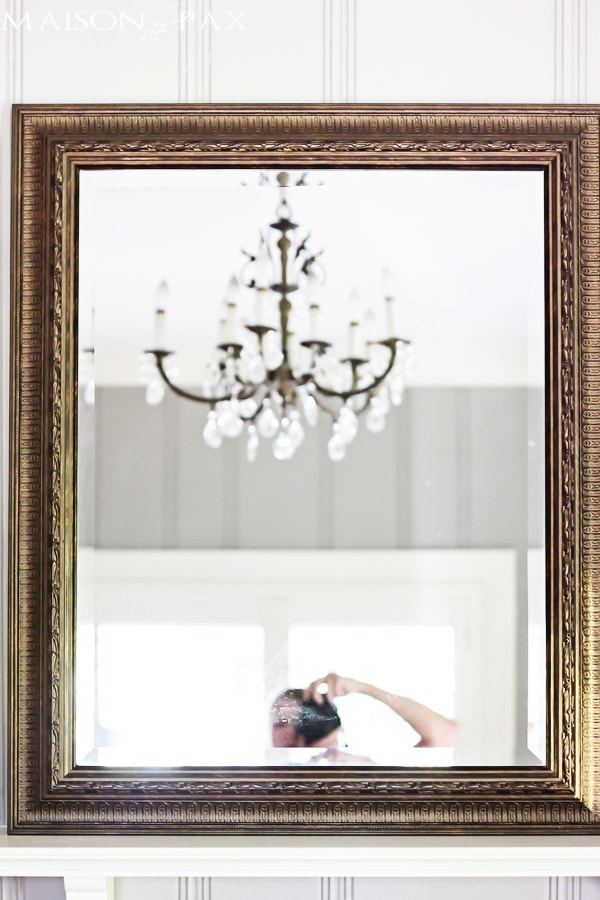
But a mere 10 minutes {and semi-permanently gold fingernails} later, I had this beauty.
I’m telling you, this stuff is addictive.

With just a dime-sized amount on a brush or rag, I simply wiped it on…Could it be any easier?
4. Lightly buff the finished product with a clean soft cloth to make sure there isn’t any excess and to produce a little more luster to the sheen.
5. (Optional) If you apply too much rub n’ buff and the mirror doesn’t have as much dimension as you would like, you can apply a little dark wax into the crevices for a more antique look. I didn’t do that on this frame, but I have on other projects.
Tips for a Smooth, Professional Gold Finish
- Apply lightly (you can always add more)
- Don’t fill in the cracks (you don’t want the frame to be solid gold)
- Buff to shine
Gold Paint vs. Gold Leaf: Which Should You Use?
I have gilded frames before. I’ve used paint (and I love this layered look – it has such depth and texture). I’ve used furniture gilding wax (simple and easy, but a much more subtle look). But this was my first time to gild with rub n’ buff – this little shiny wax in a tube. And I’m in love.
Final Thoughts on Gilding a Mirror Frame
Nothing else has come close to the gold leaf look of my beloved Parisian statement inspirations. The kind on the wall of our historic apartment when we lived there…
If you don’t already have a frame ready for this, try searching for an old mirror at a thrift store or facebook marketplace (see all my tips for finding the best furniture and home decor on marketplace here).
What do you think of this easy diy project? Could you use a perfect gold frame?
Love Rub n Buff! Just a few dabs goes a long way! It is so beautiful! Like you said, the perfect gold!
Right?! I can’t believe I hadn’t tried it before!!
Beautiful,i love it and i am going to try this myself. Have a great day.
The rub and buff is amazing Rachel. I remember my mom using it to do frames when I was a kid. (Guess I come by this stuff naturally:) I am wondering if you think it would work to make a flat frame gold, as well? One that started out black??
Sounds like you definitely came by it honestly, Krista! And I think it’s totally worth a try. I’ve heard some people say that they’ve had trouble getting it to adhere to especially flat pieces, but it stuck perfectly to the flat edges of my frame, and you’re not going to be handling a frame much… I say go for it! 🙂
Such a gorgeous makeover Rachel!
Thanks, Sarah!!
You convinced me to do this! I actually never tried it.. but seeing yours just makes me run to the stores and do it right now!! I have a mirror that’s so beautiful but it’s in Silver and wanted always make it gold. 🙂
Thank you!!
You are so welcome, Yasmina! I’m so glad to hear it. 🙂 I hope you love it!!
Hi Rachel, Your frame turned out beautifully. How very french of you ( : I have a beautiful beveled oval mirror that i would love to do this to but haven’t decided where to put it yet. I had it above our fireplace at the old house but here at the new one its not so easy. I have a fireplace but it’s not your tipical fireplace. It a gas stove in the corner on a brick hearth with brick behind, to the right is the t.v. on a console and i was going to do a gallery wall above it so i don’t really know where to put the mirror now ?! For the first time in my life i am stumped ! ((**)) ! It just wouldn’t look good on that wall or the second wall, then the third wall is windows and there is no fourth wall ( open to dining room ). If it was square, round or rectangle it would look beautiful in amongst the gallery or on the second wall. Oh what to do, what to do ?? How is your move coming ? Mine is coming along nicely but slowly. I have alot of painting to do, there is alot of oak in all three bathrooms and the kitchen needs painting so I have my work cut out for me. Thanks for letting me vent, I mean write my thoughts down. Take care and have a wonderful day. Diena
Thank you so much, Diena! It’s like a game of musical artwork, isn’t it? 😉 I’m so glad to hear you’re making progress… It is such a process. I’m trying to take it one day at a time. And though I don’t have any oak trim to paint (I can’t say I envy you there!), I do have 8 more rooms – walls AND ceilings left to paint. Like I said, one day at a time… Hope you have a wonderful week! xx
Love this idea! I am a huge fan of gilding antique or thrifted mirrors. Do you think this only works on a frame that already has a gold-ish tone? Or would it work on other colors as well?
Thanks- love your site btw!
Great question, Lauren! The stuff is pretty opaque, so I think you could manage on a mirror of almost any color. It may have different undertones, obviously, but you could always put on a second or third coat if you needed to. Hope this helps!
Hi Rachel,
I chalk painted and clear waxed several pieces of furniture. My question is..can you use this over a waxed piece? I want to highlight some of the areas on these pieces. I love what you have done with the rub and buff and also the other gold wax tutorial. Thank you,
Becky
Hi Becky, great question! I have not used this over a waxed piece, but my guess would be yes. It’s actually a wax product itself, if I understand it right, and it seems to stick to almost everything. If I were you, I’d try a tiny bit on an inconspicuous area to be sure, but I think it would work great. So glad you like these posts!
All you did is use the rub and buff to make it gold? Or was I a two step? This is beautiful. How would you do a bare Frame? Thank you.
Rub n buff really is that easy! Try it in an inconspicuous first to get the hang of it, but you really can simply rub the stuff on and transform it so significantly. I hope this helps!
This seems to be the same product I have used as a child with ceramics. MY Mother started us in when I was around 8y/o. I’m 53 next week (ouch). We never glazed anything. Entering the local competing arena’s winning from 1st Place to my 3rd & Honerable Mention at 8 & 9. Amazingly I still have them. One is an owl with “guilt”.
We always used stains, make up, toothpicks, with several more hacks. Mother made a grey and white with black church. Carving out the windows and making them stained glass with a night light inside. Beautiful and First Place. The stained glass was made from the colors we all know except they were tiny little pepples she’d molded to fit and stay in place.
We’d paint as if the piece were more than dollar store items. Giving more of a project than 3 coats of glaze before firing.
These ceramic shops are obsolete in my area. Sure wish they were around, lots of fun.
Thanks for your posting. I knew there had to be something like it in a craft store. Now I know, thank you again. Now I can touch up my frames and More from a recent horrible move.
This product looks a bit different from then, was in a small jar, different colors, size of a eye shadow one color little thinggy. Seemed to be in a more denser formula. You’d have to rub your finger in and use it, or a piece of paper towel or painting clean up rag, we’d always use our fingers to get to the exact places sometimes very precise places to get the real look. Using very small amounts. Can always add to but never take “it” away unless you repainted. After the Guilt we would then stain, taking the very bright but visible.
So glad it was helpful!
Great project. Do you think it could be sealed after applying? We probably won’t be handling much but I’d hate to wipe it of when cleaning.
I think you could put a clear polycrylic seal on it afterwards, yes!