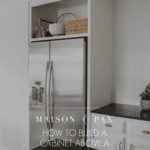
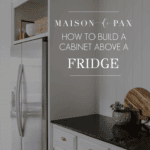
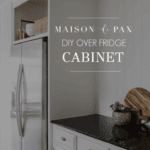
DIY Over Refrigerator Cabinet Surround
Want to maximize storage with an over refrigerator cabinet? Find out how to build one yourself with this DIY cabinet surround tutorial!

When we purchased our new house last year, the kitchen was a good size and had granite countertops, but it still needed work. My least favorite element was the refrigerator hanging out all by itself at the end of the kitchen cabinets, blocking the view into the kitchen and making that entryway feel extremely crowded.


I already shared how we removed the small upper wall cabinets and installed vertical planks for a more open, modern look. But today I want to share how I built a cabinet for the refrigerator, giving it a built-in polished look and adding attractive storage above it.
Refrigerator Cabinet Surround
Step 1 was to get the fridge into a less obtrusive corner and give it a surround so that it looked more intentional and less of an afterthought.


To do so, I actually detached the cabinets from the wall that were to the left of the fridge and moved them over to the right about 3 feet, giving me space to put the refrigerator in the corner. Then, my fridge cabinet only needed one side, rather than two.
But if you have a freestanding fridge and need to build two sides, this same method will work. Get all the details below.
Over Refrigerator Cabinet
I could have simply left the refrigerator tucked into its side panels, but I wanted to make use of the dreaded dead space above the appliance for larger items. They do make over fridge cabinets that you can purchase premade at a big box store, but I wanted a more polished look that fit my exact dimensions to maximize the storage space.

Instead of building a traditional cabinet box and installing it to the wall above the fridge, I simply used the new fridge surround almost like a bookcase, adding a shelf and finishing it out with trim work.
I chose not to put doors on the cabinet because it would have been very difficult to match the original 1980’s doors of the kitchen. Instead, I lined the cabinet with the vertical planks that I used on the walls of the kitchen, giving it a cohesive look. You could certainly put doors on the cabinet, though, or use regular plywood to line the inside of the cabinet for a cleaner look.

What you need to build a fridge cabinet
This post contains affiliate links. Click here to read my full disclosure.
Materials:
- 3/4″ plywood for side panels and shelves (I would not recommend mdf, as it is not moisture resistant)
- 1x2s for face frame (again, solid wood is preferable over mdf)
- 1×8 (or 1×6, depending on your preference) for the top facing
- vertical nickel gap plank panels or 1×2″ plywood for sides and top of cabinet
- decorative crown (optional)
- (and just for reference): our cup pulls and utility pulls – both in unlacquered brass
Tools:
- table saw
- miter saw
- level
- brad nailer
How to Build a Refrigerator Cabinet Surround and Over Fridge Cabinet
Step 1 – Take your measurements for the fridge surround
Counter depth refrigerators will fit inside a cabinet that is the same depth as your counters (as the name suggests). Standard size refrigerators stick out a few inches farther. You need to measure the width and depth of your fridge. Also account for the movement of the doors so they can swing fully open. Remember that you will subtract 3/4″ from your desired depth to allow for the 1×2 facing you will add later. Also account for the 1.5″ width of the 1×2 facing.
The panels will go all the way to the ceiling.
Step 2 – Make your cuts for the fridge surround
I used 3/4 inch birch plywood to cut a side panel for the fridge cabinet. I also cut plywood into 1×1 strips to use as cleats to secure the panel to the ceiling and to hold the facing on the wall side of the “cabinet.” If your cabinet is free standing, then you will need 2 pieces of plywood for panels.
Step 3 – Install your side panel(s)
Make sure your panel is plumb and secure to the cabinet or cleats using wood screws.

Step 4 – Plan your shelf
Determine the height of your fridge and add just about 2.5 inches. This allows for the 1.5″ facing and should give you clearance to slide the fridge in and out. Use a level to draw the height around the inside of the cabinet.

Step 5 – Cut and install cleats for the shelf
Cut more cleats of 1×1 plywood for shelf supports and predrill then install using wood screws along the line you drew.

Step 6 – Finish your cabinet interior
I chose to use the vertical planks that I used in the kitchen. So I cut small panels to fit above the shelf cleat. This is optional. The inside of the plywood you used for side panels is ok, too. If your walls are heavily textured, you may want to at least line the back of the cabinet to give a more finished look. The sides of the interior of the cabinet are easily installed using a brad nailer. Just be sure you nail into studs or plywood.
I decided also to add vertical planking to the ceiling of the cabinet. It was an after decision for me, so the images may seem out of order. But I would recommend you do it now before the shelf is in your way. To do this, I simply added two more 1×1 cleats (to match the one that was holding up my side panel). Then I screwed them into ceiling joists. I then secured a panel of vertical planking to those cleats with my nail gun.

Step 7 – Finish out the top of your opening
Start by securing a 1×6 (or taller, if your crown is tall) across the front top of the opening. I used pocket screws to secure it. Then add crown molding.

Step 8 – Install your shelf and trim
The final step is to install the shelf that will sit above the fridge. It also acts as the bottom of the cabinet. Measure and cut 3/4″ plywood and simply rest the piece of wood on the cleats you installed earlier. Attach with wood screws. Then cut a 1×2 as a facing for the shelf and install using brad nails.

Finish your Fridge Cabinet
Of course, the next step is to fill, sand, caulk, prime, and paint. The interior of open cabinets should receive the same level of care as the outside of regular cabinets. Here is a tutorial for painting cabinets.
Since I chose an open shelf, I wanted something prettier than cookie sheets, muffin tins, and small appliances. But those are wonderful things to store up there if you need a large space. Instead, I have used my new cabinet for kitchen items that can double as kitchen decor. A punch bowl, some baskets, a wood utensil caddy, and serving trays.

I love the easy access of this upper cabinet and the polished look of the custom cabinetry. I hope these these instructions can help you build your own fridge surround. And that these fridge cabinet ideas have inspired you to make the most of your storage space!


It’s always so fun to see what remarkable results you obtain using your skills and clever mind!
That is the kindest comment, Catharine! Thank you so much!!
It turned out really nice and looked so much better. I can’t wait to see what else you come up with.
Thank you!
I’ve been struggling with how to do this and am so glad i found your post! I’m curious – for the 1×2 facing around the edges, how did you align it with respect to the 3/4″ plywood edge? did you center it so that a small amount of the facing protrudes both on the inside and the outside of the surround? from the way your counter butts up to the surround, it looks like more probably you aligned the outside edge of the facing to the outside edge of the plywood so that the facing only protrudes into the inside of the surround… just curious if you have run into any practical issues with having that little lip in there (also for the facing on the horizontal shelf!). thanks!
You are correct, I aligned the facing with the outside of the cabinet and left the overhang on the inside. No issues at all! And for the shelf, I always align with the top and leave an overhang on the bottom. It’s pretty common when building cabinetry to have overhangs like that. I hope this helps!
got it, thank you!!!
Is the outside facing the kitchen bench just the painted plywood surface? I.e. there’s no veneer or anything on it?
I used a cabinet grade birch plywood, so yes, it is just the plywood, but it has a paint-grade finish which I primed and painted. I hope that helps!
How much did this project cost you?
I actually already had all the materials I used for this leftover from other projects… So it didn’t cost me anything but time. However, depending on your exact dimensions, you could probably do it with just 1-2 sheets of plywood and a few trim pieces, which would run you $100-200 depending on your exact choices. I hope this helps!